Part 1
Overview
Upgrading to newer hardware is a time of excitement. In most cases this means a new up-to-date computer, new cameras with more pixels and better resolution, and new light LED’s that can produce more light. This is great for improving the performance of the machine.
However, it can also mean plenty of time editing VMS programs that were created using the old hardware. Suddenly the lights are now too bright because more powerful LED’s are now being used. Or finders are too small and slightly out of place. These are usually the biggest issues that arise and certainly the most tedious. This issue will cover tips on lighting and the next will cover finder sizing and location to help smooth out this process.
Light Setting Steps
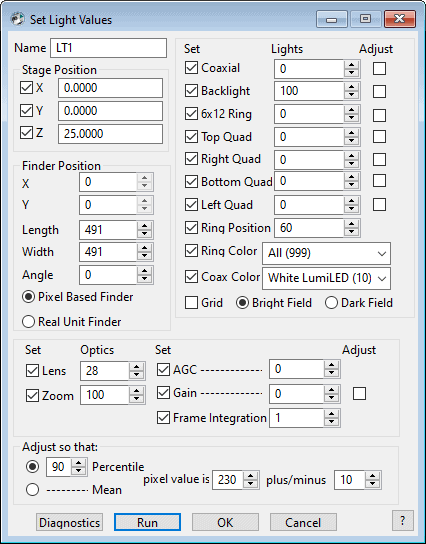
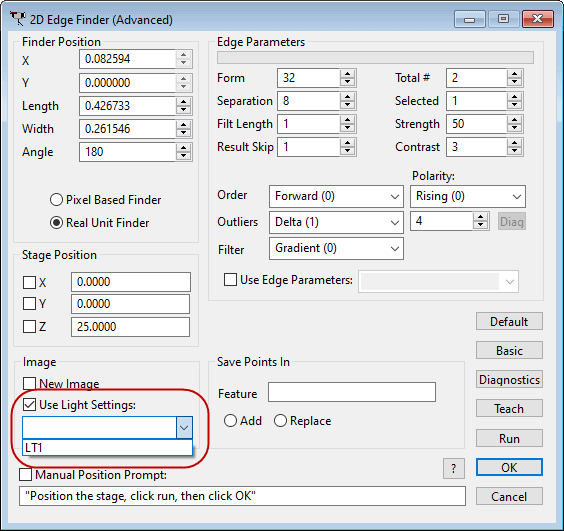
In general, the usage of Light Settings inside finders is highly encouraged. The option for this is found in the advanced view of every finder type. This allows the user to define a certain set of lights that can be referenced later by any measurement step. It covers everything that would need to be set from the intensity of the lights to the position of the Programmable Ring Light (PRL).
Using a Light Settings step will save massive amounts of editing time in larger programs. For example, a program may have 5 measurement steps use the same finder lighting. Without using a Light Setting in the finders, the user would have to edit 5 steps every time the lighting needs to be changed. However, by using a Light Setting inside the finders only one edit to the Light Settings step is needed. That change to the lights will then be applied to all finders using that Light Setting.
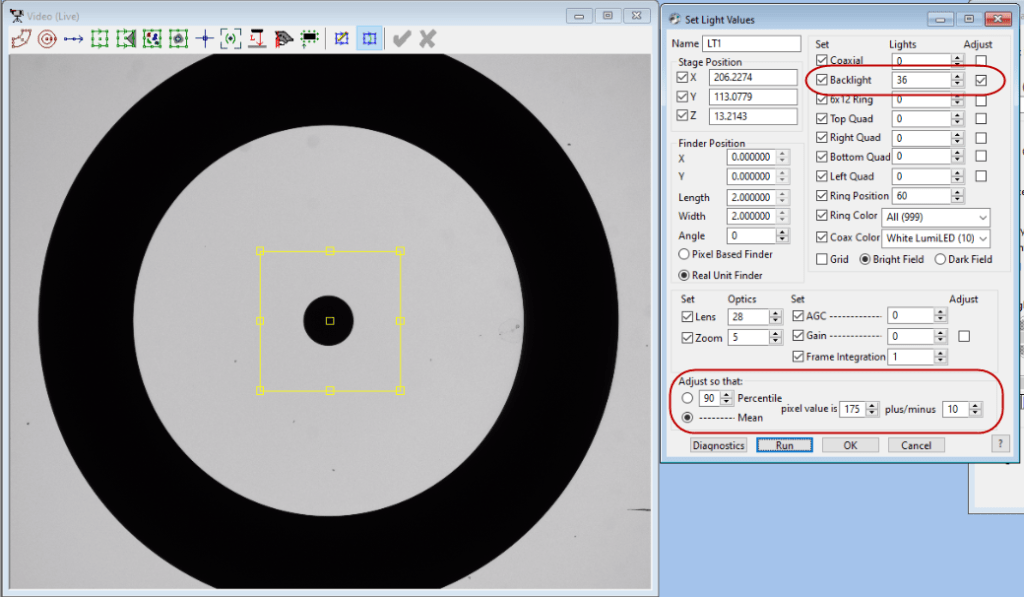
Automatic Adjustment of Lights
Within a Light Settings step there is the option to adjust a light source so that the average brightness within an Area Of Interest (AOI) is of a desired value. This ensures that the actual brightness of the image stays the same even though the values of a light source are different because of upgraded hardware.
Below are example images where one system has a much brighter backlight than the other. In both cases the adjust checkbox is checked for backlight and an average brightness of 175 (range is 0-255) is chosen. In one case the backlight is adjusted to a value of 3 and the other is adjusted to 38. However, the image brightness is the same in both cases without the user ever having to manually change that value.
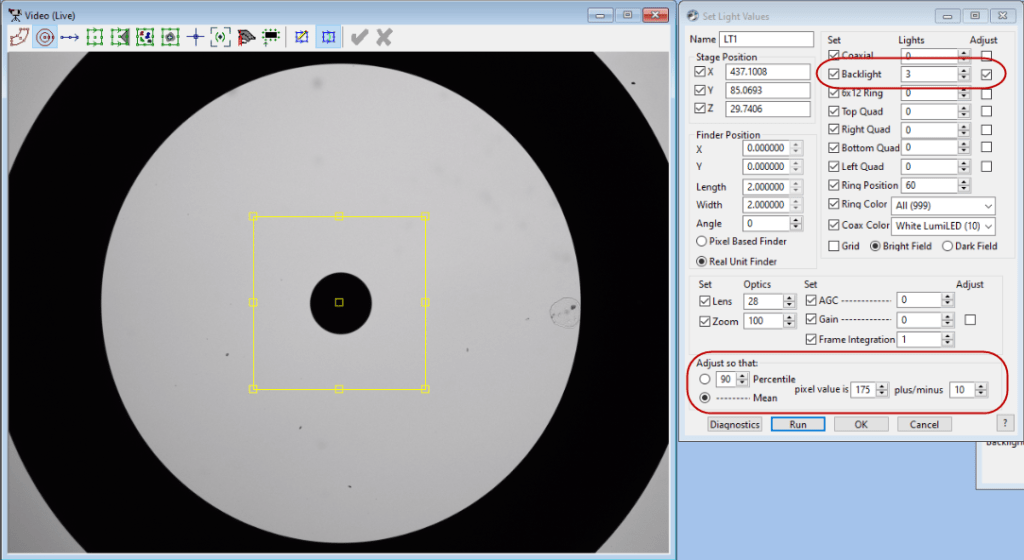
This feature ensures that even if the program is now running with a different camera that reacts differently to light or the LED’s have changed, the image brightness that the program expects is still the same. No user input or time-consuming edits are needed. Of course, it should be noted that it takes 1-2 seconds to adjust the lights. That means that it may not be prudent to do this every time the program is run and instead setup the program so that it only adjusts the lights when the program is first run with different hardware. Set it once on the new system and then forget about it.
For more information about Light Settings please check the VMS reference guide in the Advanced Programming section. Our Applications staff is also available to answer questions on how best to implement these practices. Stay tuned for the next issue covering finder sizing and location.