Arrays are a powerful tool in VMS that can be used to simplify programming and make the most out of advanced VMS functionality. Arrays are most useful when measuring a large amount of features in a step and repeat and while loop. Without arrays, it is very difficult to create unique names for all the features measured, which makes programs convoluted and statistical analysis nearly impossible. Arrays will improve program clarity and brevity and unlock some of the most advanced and unique tools in VMS. This article will cover the basics of arrays and how to use them in VMS. The more advanced uses of arrays will be covered later articles.
A VMS program showing an array in use can be downloaded using this link. This program uses some advanced topics not covered in this article, but shows how to use an array with a step and repeat on the Fast Start part.
What is an array?
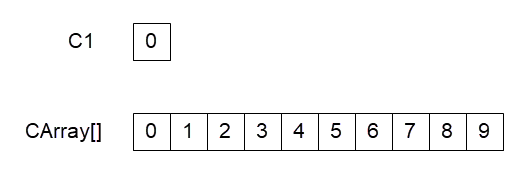
An array is a collection of objects that all have the same type, e.g. circles, lines, points, or strings. A good visual for a one dimensional array is to imagine a single row on a spreadsheet where every cell can be an object in the array. In this example, every cell represents a different circle that is contained in “CArray”. The circle “C1” only contains the information for a single circle (the 0 box). The circle array “CArray” contains the information for 10 different circles (0-9 boxes). Note that when using and referring to arrays in VMS, the first position is always 0. In VMS all counting for array positions starts at 0 and not 1.
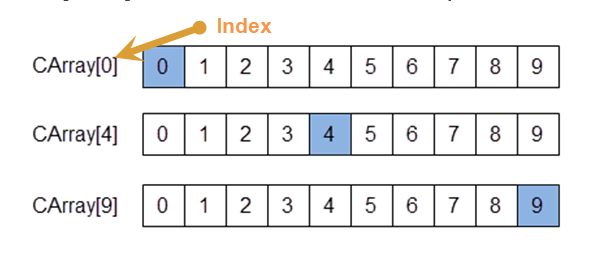
To access the different objects in the array, an index must be specified. The index is the integer that is entered in between the brackets of the array. In this example, entering an integer between 0 and 9 will access a different object.
How to create an array in VMS
To create an array in VMS, simply navigate to the Object Names window, enter in a name, select the variable type, enter the number of objects for the array in Dim1, and then click “Add”. Note that for arrays with one row, Dim2 should be set to 0. Two dimensional arrays will be covered in another article.
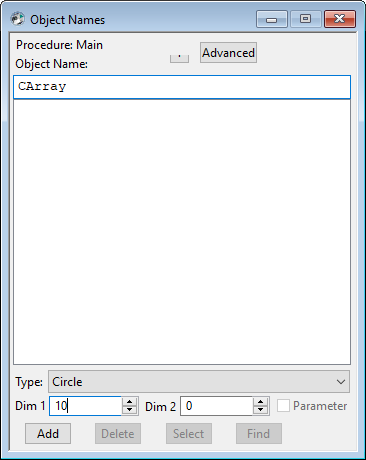
The number entered for “Dim 1” is how many objects can be contained in this. Using the spreadsheet example this would be the number of cells in the row that will contain data. When creating a one dimensional array, “Dim 2” should always be set at 0. By setting “Dim 2” to anything more than 0, a two dimensional array will be created. That will be covered in another article. It is also worth noting that when both “Dim 1” and “Dim 2” are set to 0 the object that is created will not be an array but just a standard object.
How to use arrays
To use an array, an object is measured as normal, but instead of using the automatically generated name, the array name with the index is entered. To populate the variable CArray, a circle is measured and CArray[0] is entered for the name.
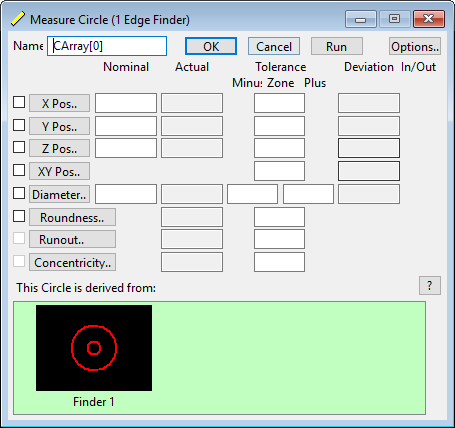
This can be done with any index if it is within the dimension size specified when the variable was created. In this example, the dimension size was set to 10 so the index can be anything from 0 to 9.
Arrays are best used when measuring multiple features that can be grouped together. This will help avoid overwhelming the list of objects used in the program and improve program clarity. Some of the more advanced uses for arrays, including step and repeat, while loops, and blob analysis, will be covered in future articles.
